Taking the opportunity to declutter my home during lockdown, I was faced with an old rocking chair that I had inherited long ago from my Auntie Susie. Made of ebonised mahogany, it originally had a caned seat and back – but the seat had long ago been replaced by a sheet of wood, and the cane back was badly damaged.

I had to decide whether to discard it, or get it re-caned. Caning was once a widespread occupation, but professional caners are not now so readily available; it is a time-consuming task, and so, quite understandably, expensive. To get my chair professionally caned would cost much more than my chair was really worth. However being a weaver, I have always been drawn to basketry and caning – after all, it is just weaving with different materials. The optimal solution was to learn how to do it myself – but all the teaching workshops I found were currently closed due to lockdown restrictions.
As I researched local antique restorers and caning professionals, I came across Tim Adams of Lazarus Restoration in nearby Malvern. He had been ready to re-cane my chair, but was also prepared to teach me, using my chair as a learning project. Over the course off several days, he showed me the principles of chair caning, and generously let me borrow his books and tools, and obtained the appropriate sized cane for my chair. Each day, I learnt a step in the process, and then went home to finish that part before moving on to the next. We started with chair preparation, and wetting the cane coils ready for working. Then began the 6-part caning process with the ‘first settings’, the initial vertical stretchings across the seat, each cane been held securely in place by golf tees. The settings are followed by the ‘weavings’ which cross the seat horizontally.

A second set of settings and weavings follows, creating an interlacement of canes.
The last two stages of the classic caning pattern are formed by the ‘crossings’ which run diagonally over and under the settings and weavings. I was intrigued by the way the crossings were described geographically, with the first crossing being ‘Yeovil to York’ (bottom left to top right), and the second ‘London to Liverpool’ (bottom right to top left). It was wonderful to see the finished pattern emerging.


Finally, cane ends were secured and alternate holes plugged in readiness for the ‘beading’. Caned chairs were originally simply plugged, but from the 1850s beading was introduced as an attractive way of concealing the plugged holes in more ‘refined’ furniture. It is created by couching a slightly wider beading cane around the edge of the work.
With the seat complete, I took my chair home to tackle the back on my own. This had to be done slightly differently as the back was slightly curved, and both settings had to be in place before creating the weavings in order to maintain the shape.

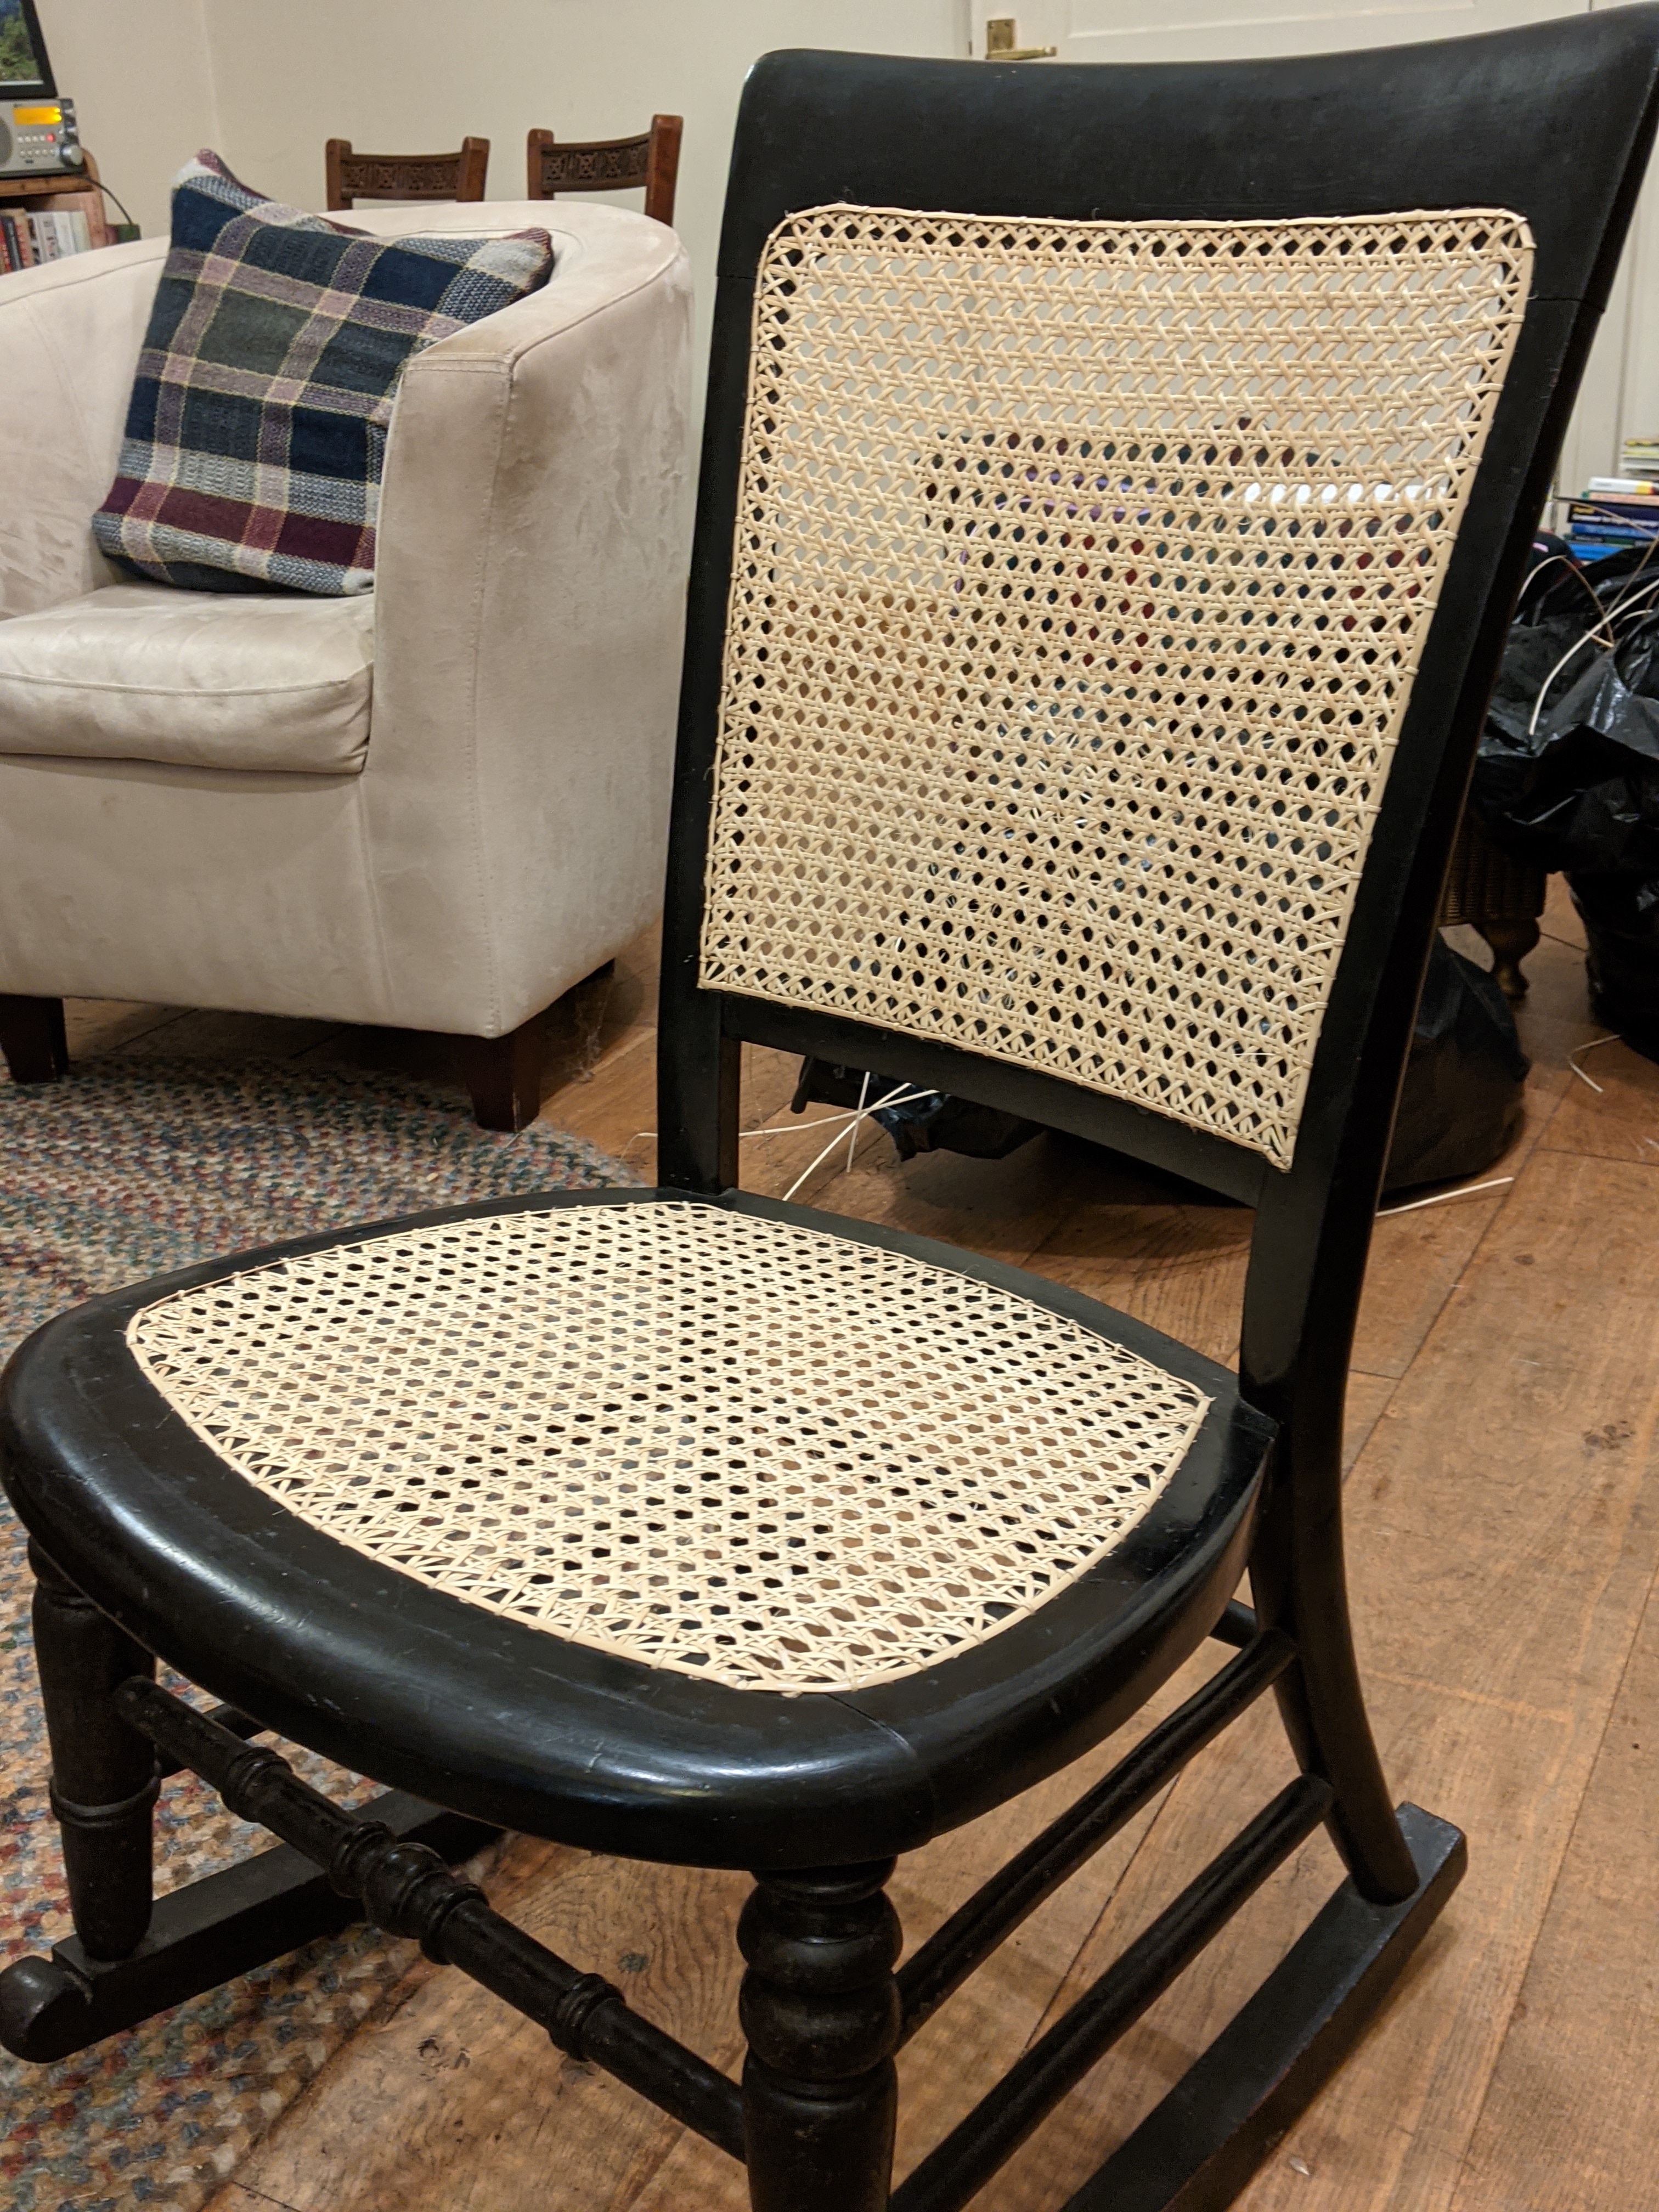
I was thrilled with my restored chair, and it now has pride of place in my bedroom. It is wonderful to bring a much loved piece of furniture back to life. I hope my Auntie Susie would be pleased.

That looks really tremendous! No wonder you are proud of your handiwork and a lovely reminder of your aunt too.
LikeLike